WSER CASSETTE AWNING MOTOR GUIDE
TECHNICAL SPECIFICATIONS
Power: AC 120V/60Hz
Protection Index: IP44
Up to 15 remotes may be assigned to each motor. Thermal protection will engage after 4 minutes of continuous running.
WIRE CONNECTIONS

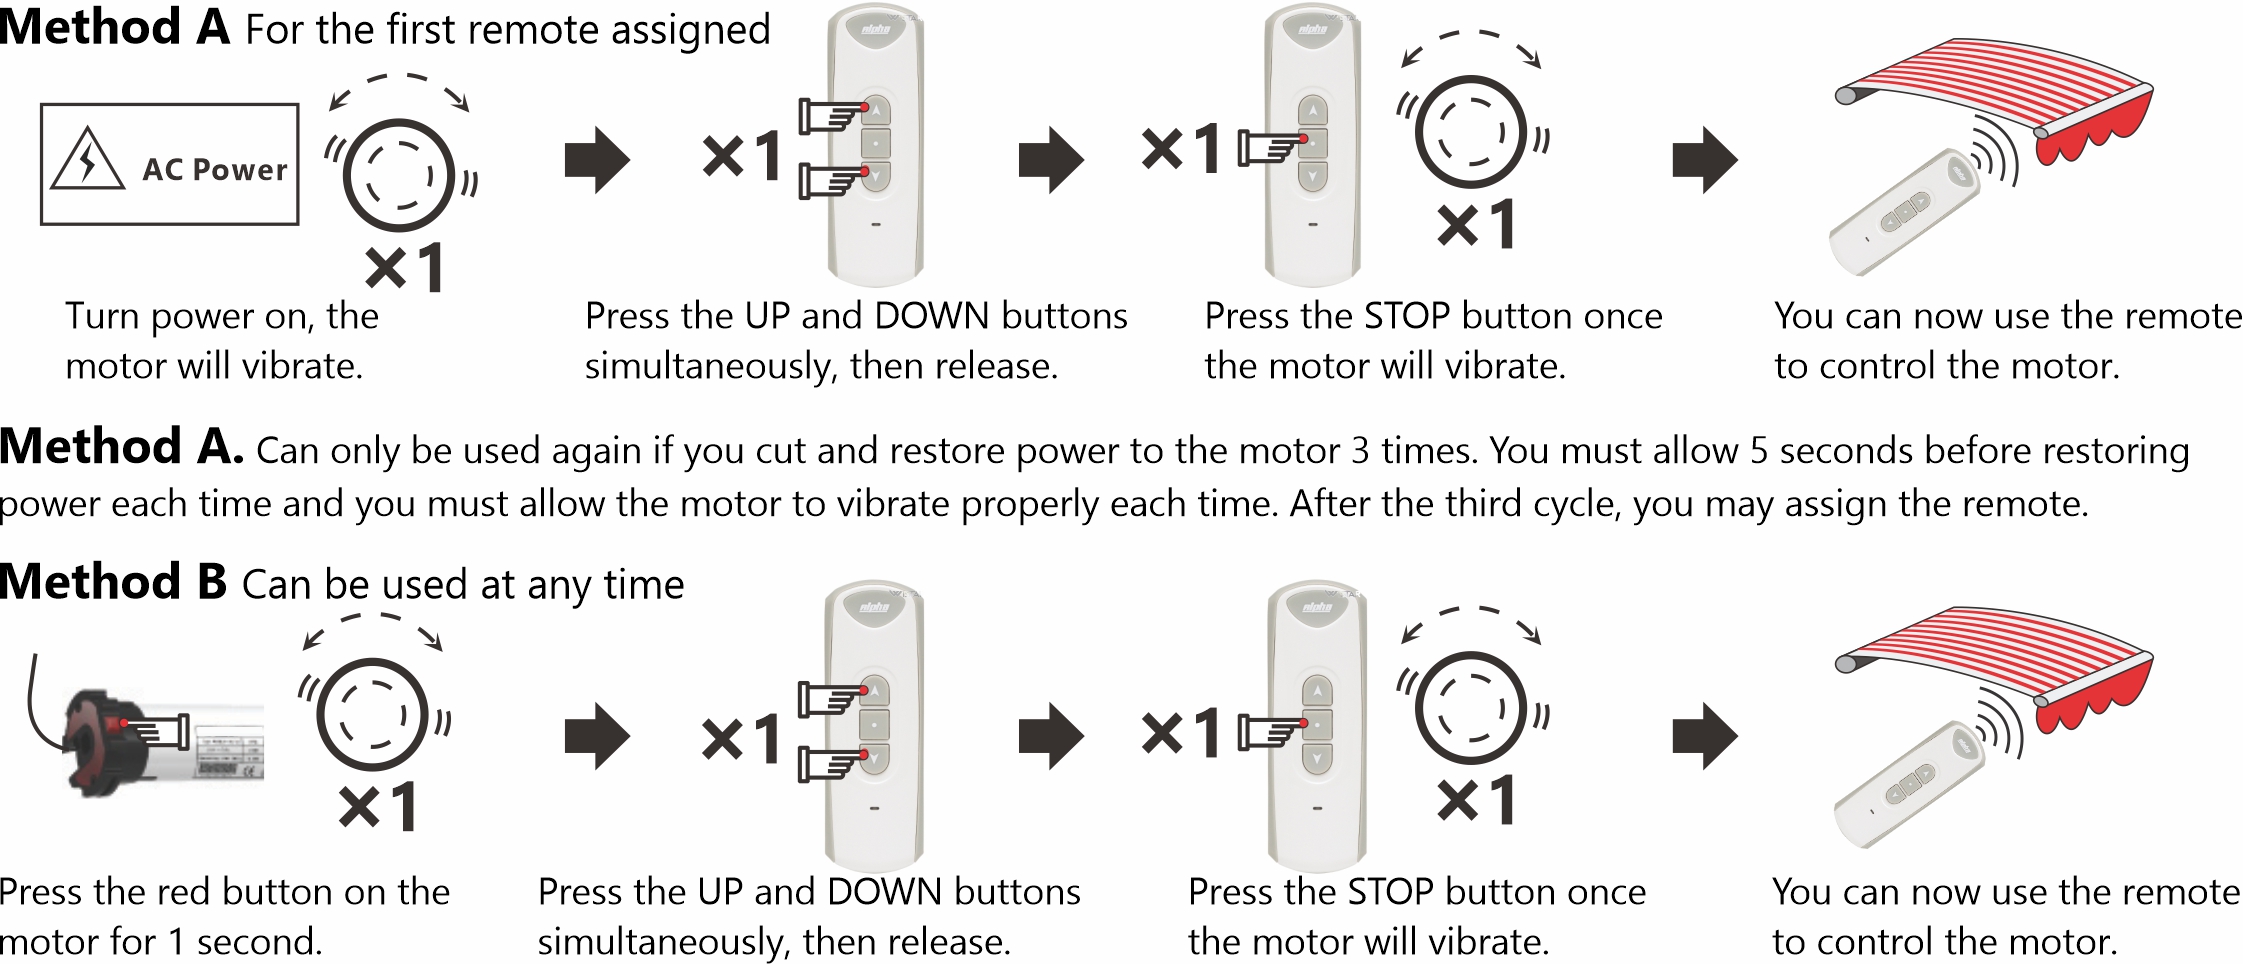
ASSIGNING A REMOTE TO A MOTOR
NOTE: You have 10 seconds to complete the task.

ASSIGN AN EXTRA REMOTE
Assign the extra remote to a motor via the original remote.

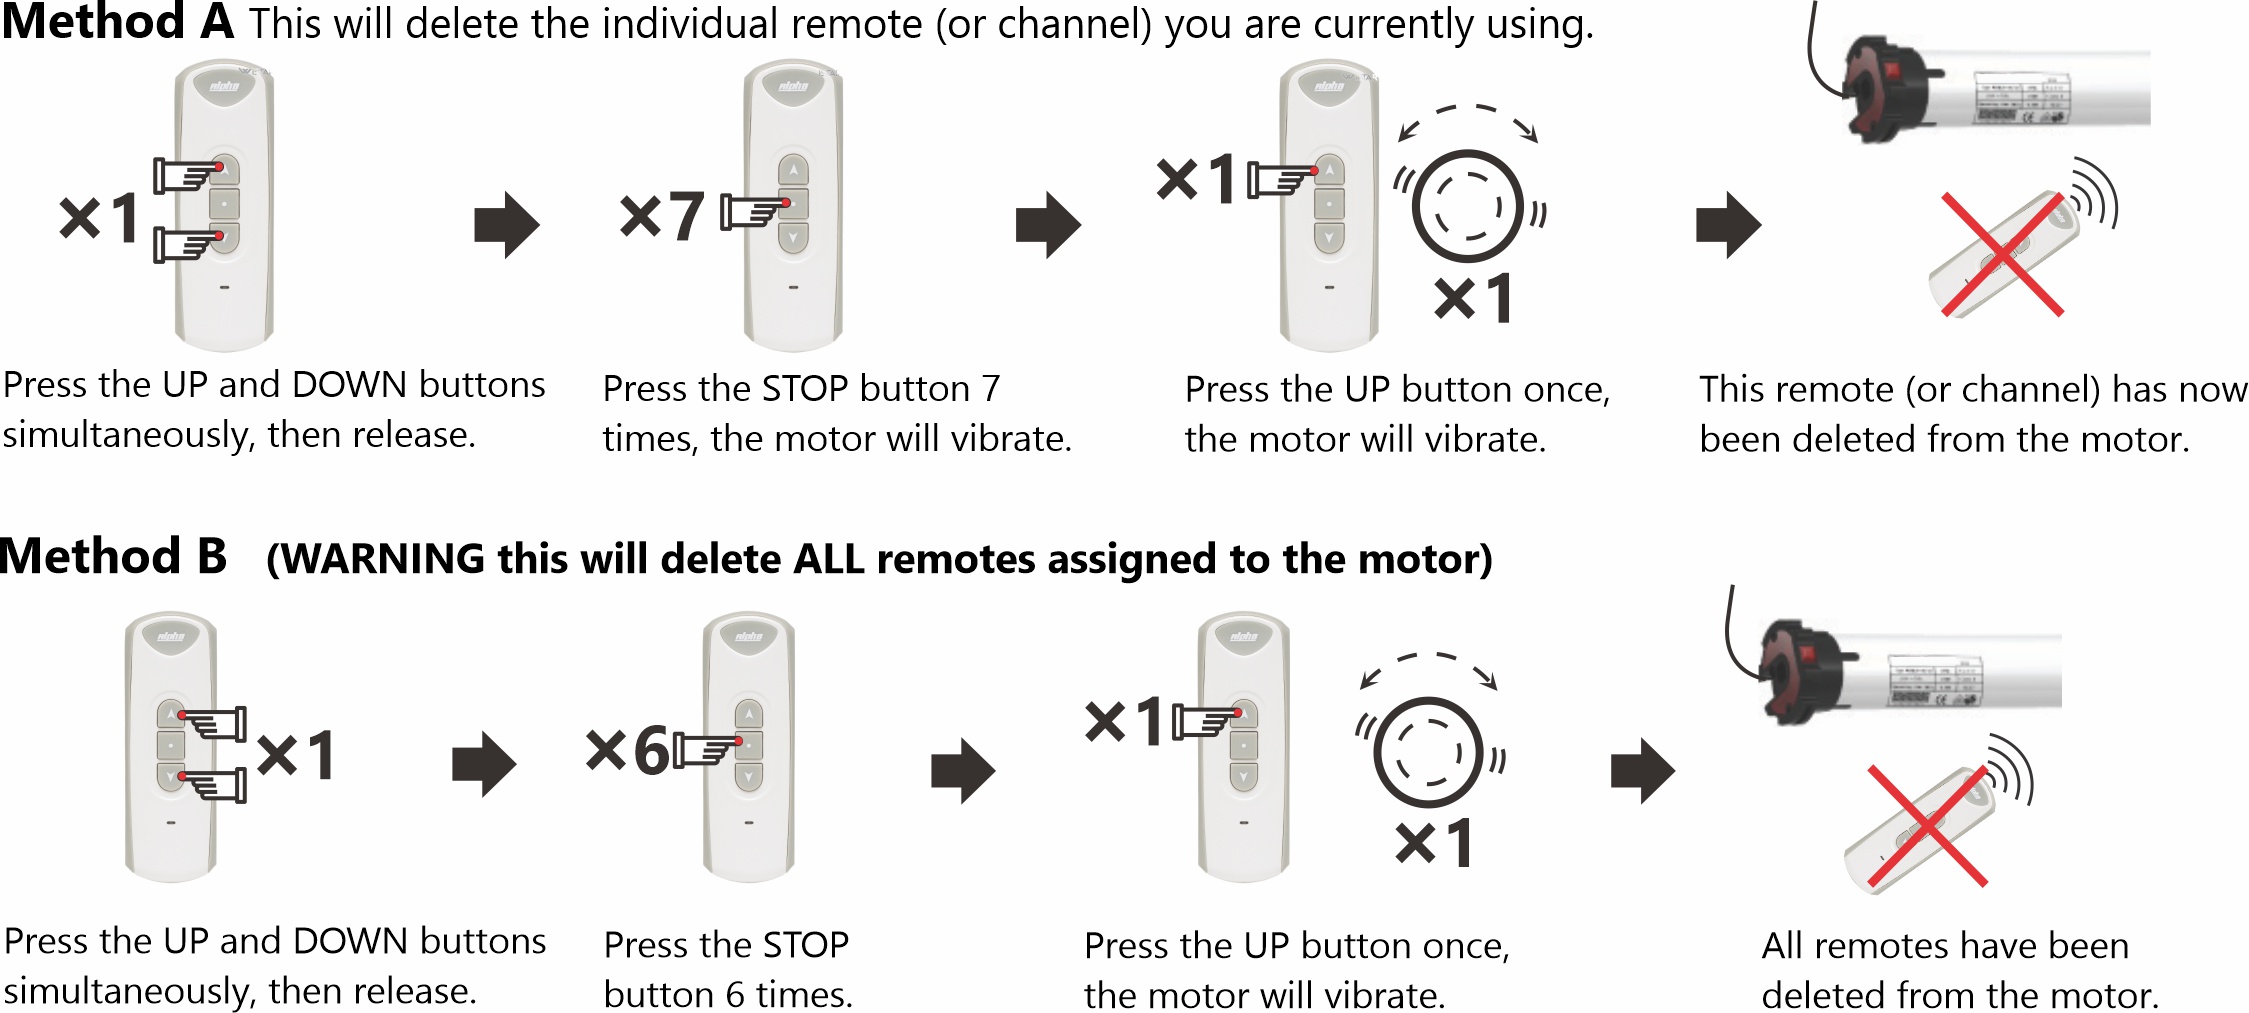
DELETING A REMOTE FROM A MOTOR
NOTE: You have 10 seconds to complete the task.

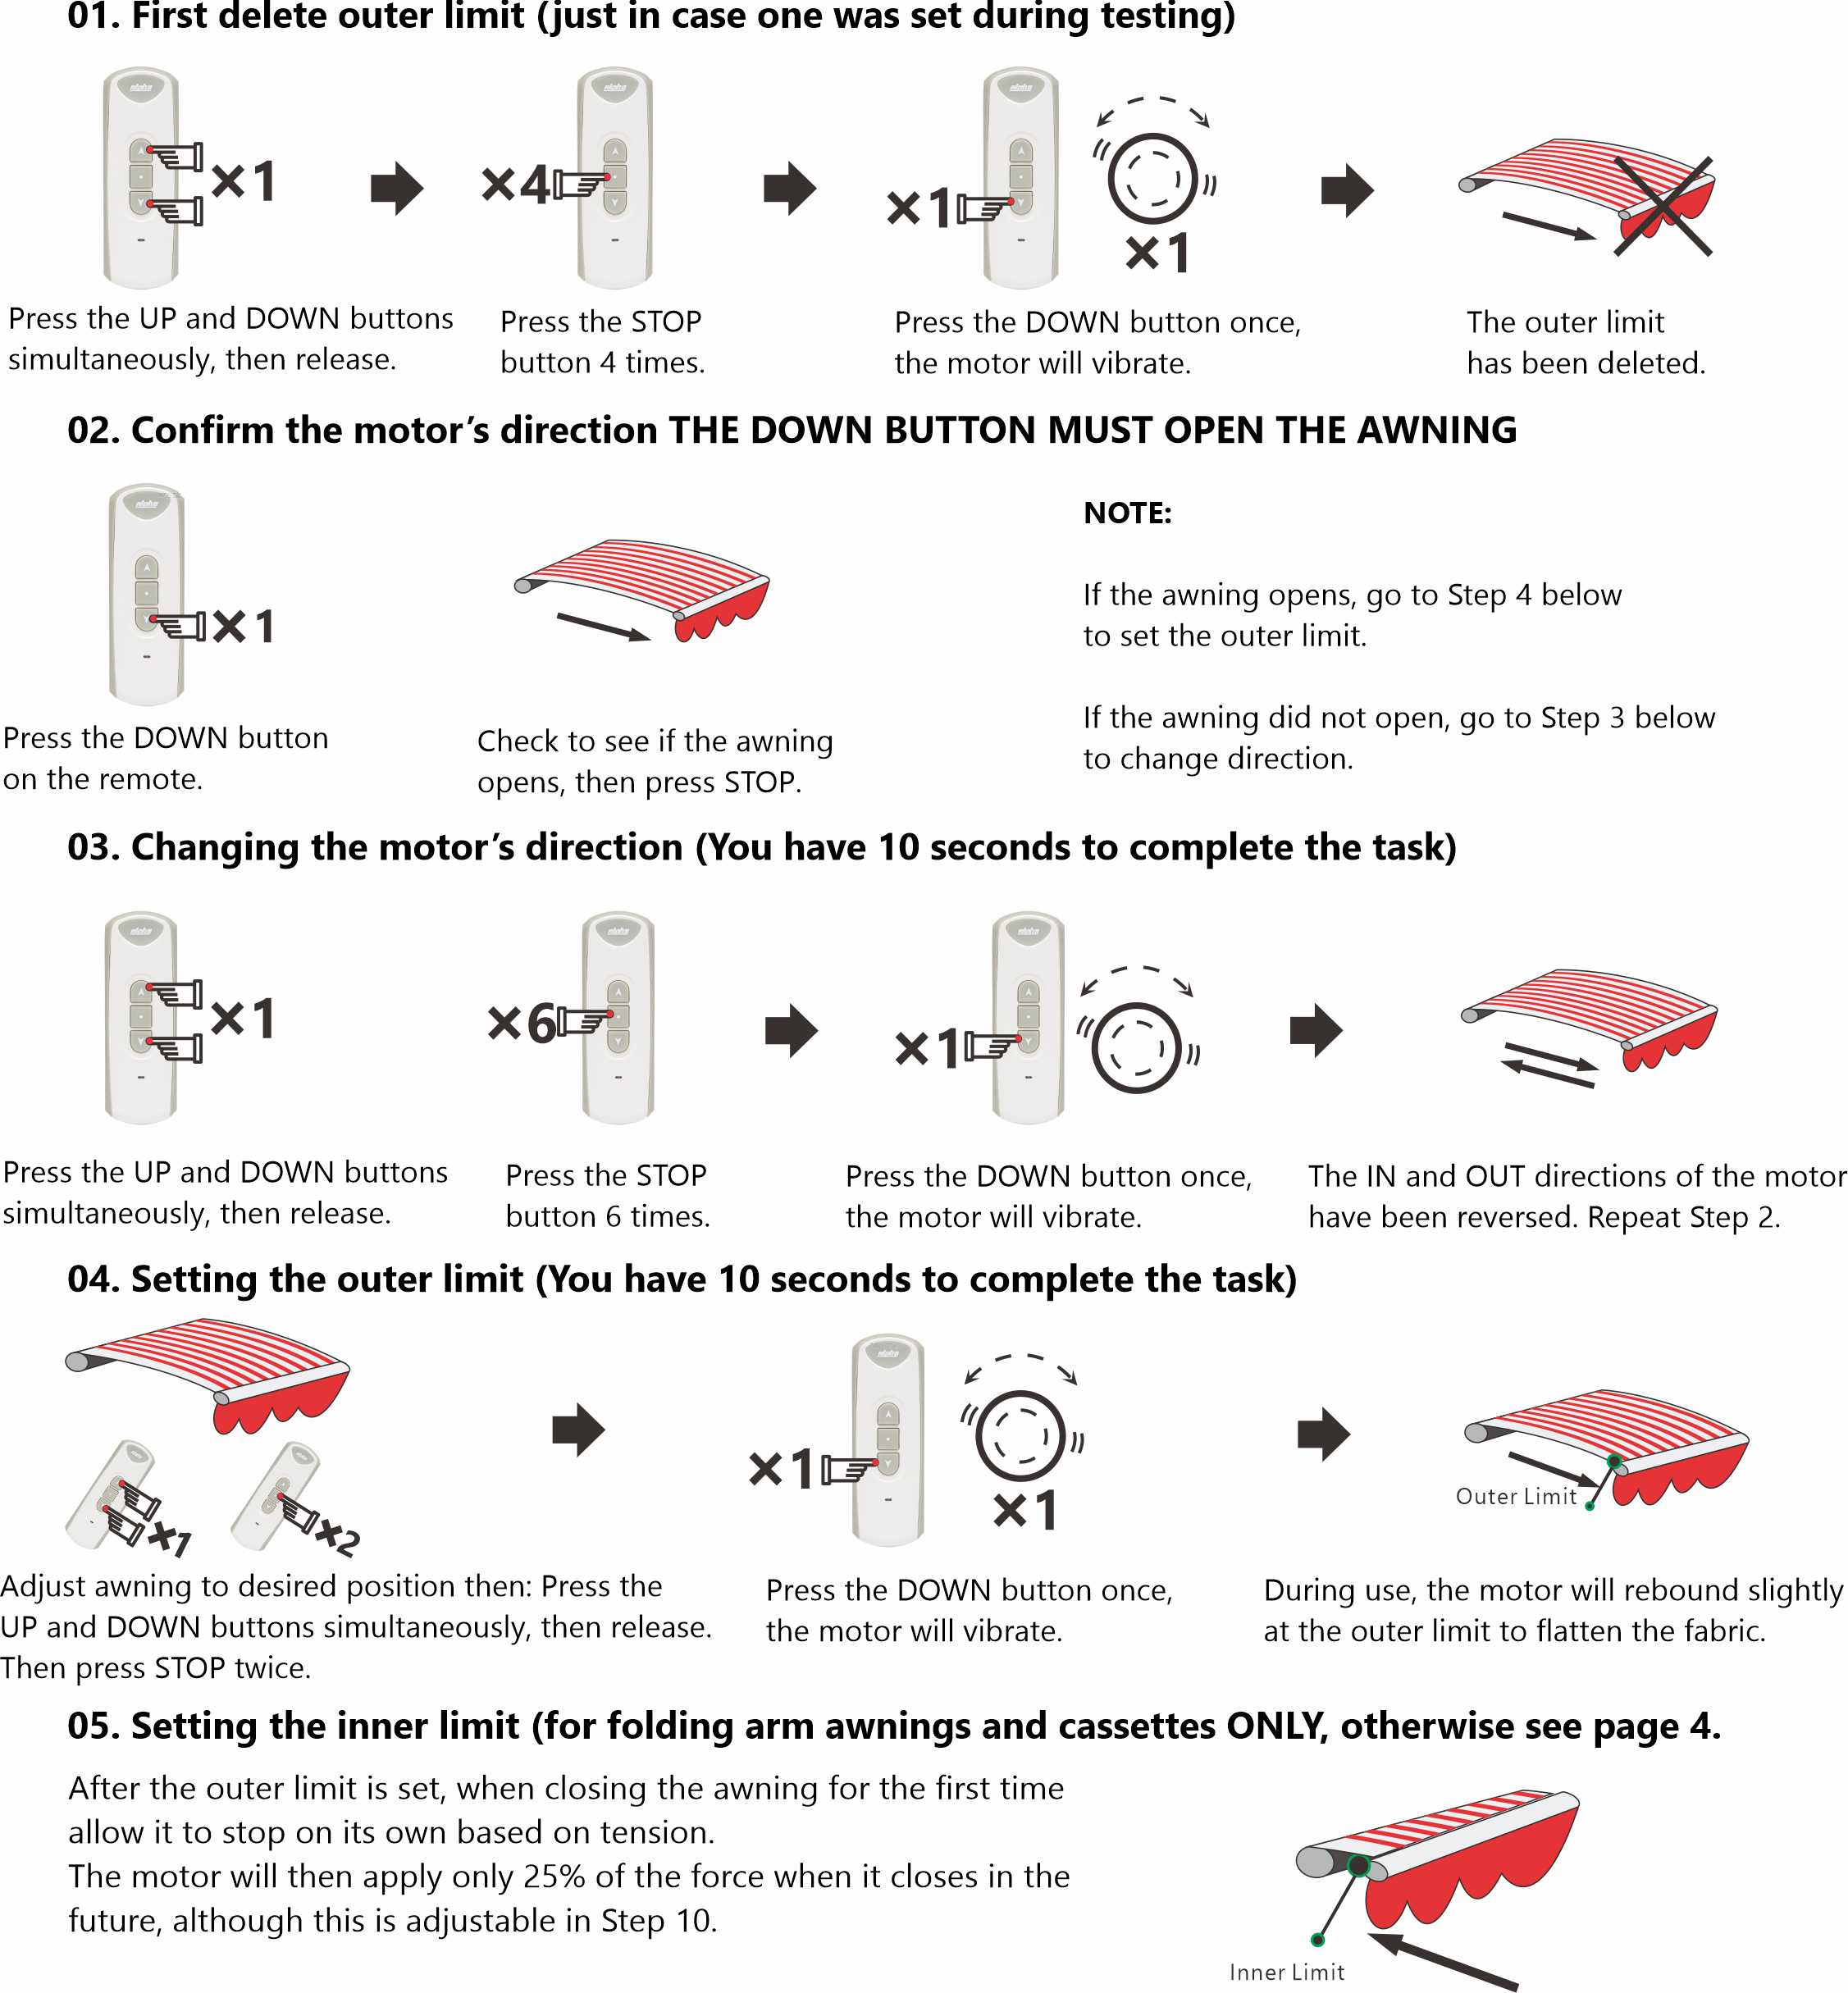
SETTING THE LIMITS
follow steps 1-5 below precisely

SETTING THE THIRD LIMIT
Midway position, between the inner and outer limits.

CHANGING THE THIRD LIMIT

NOTE: The third limit will be deleted automatically if the top or bottom limits are deleted.
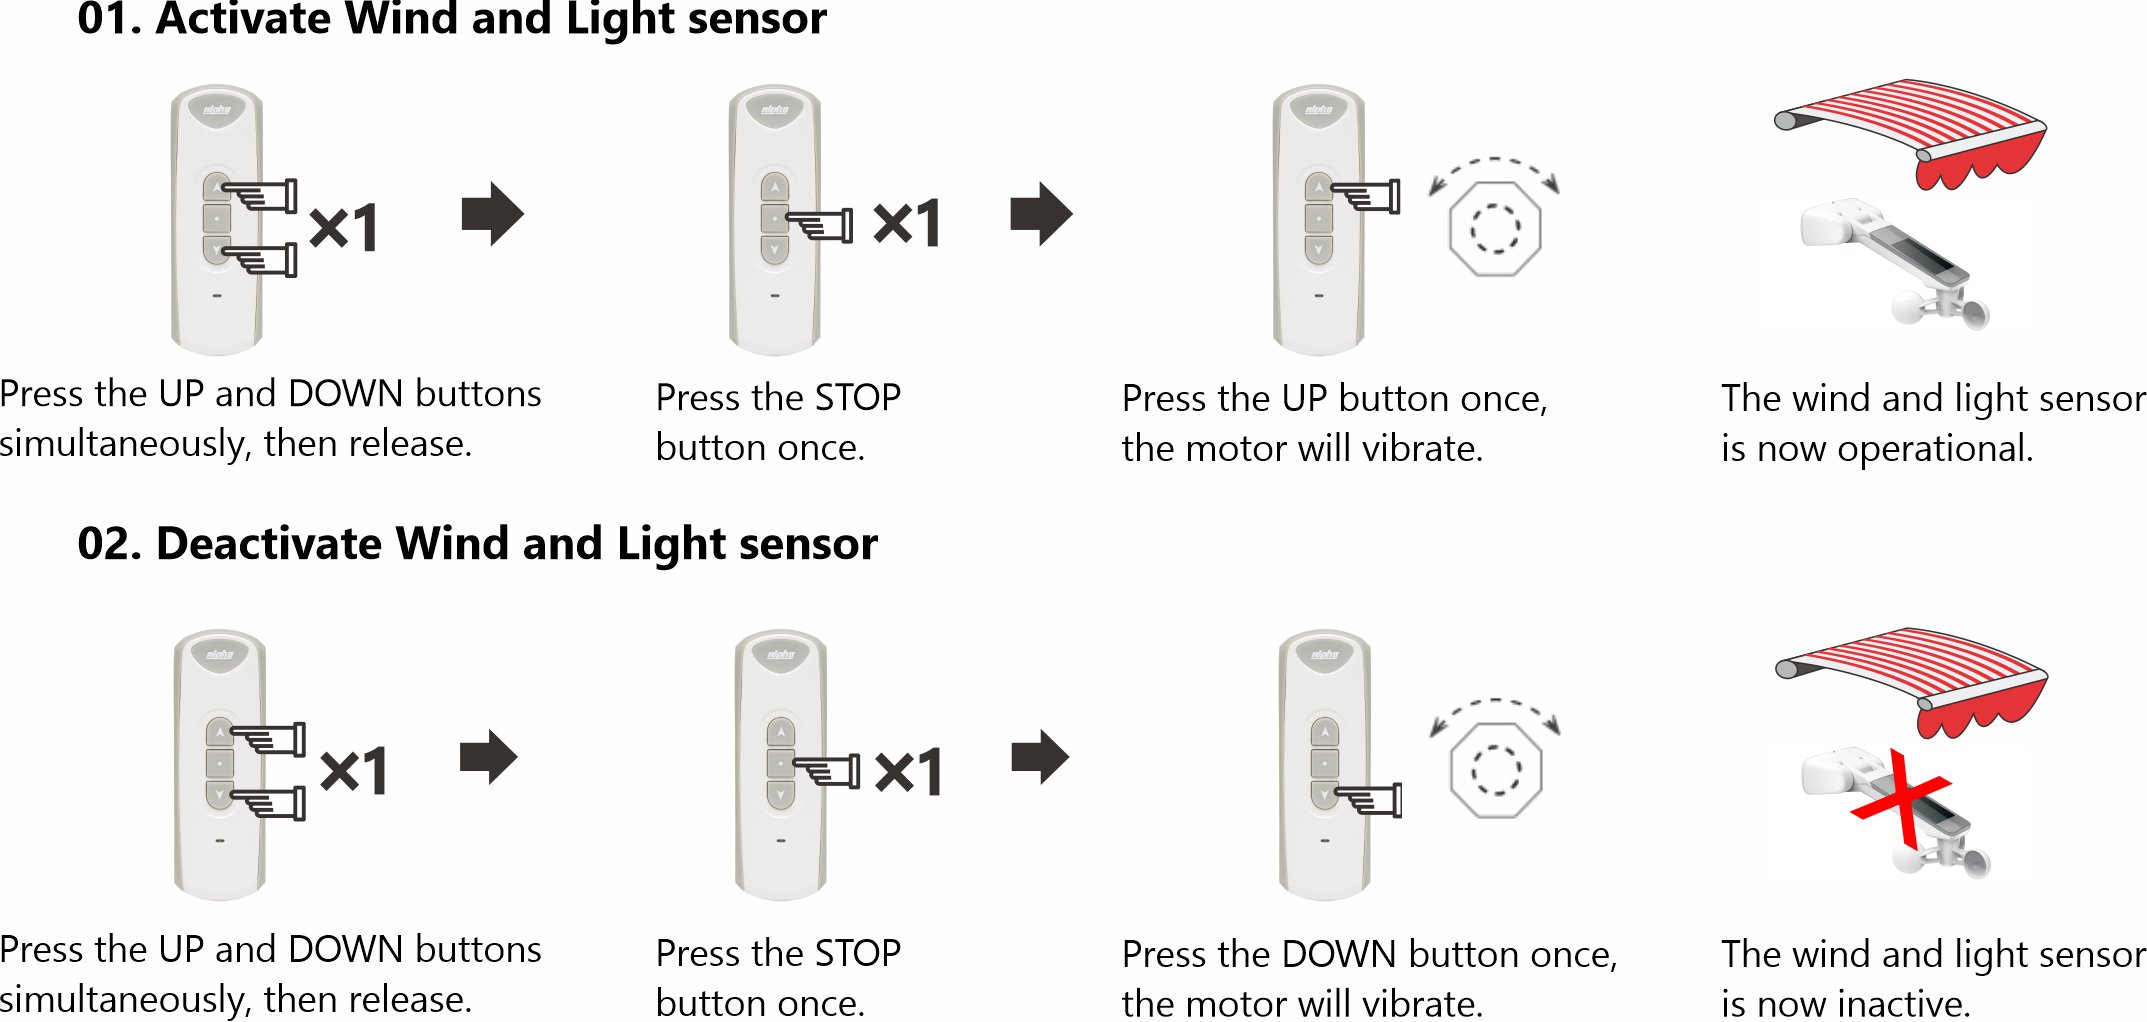
WIND & LIGHT SENSOR CONTROL

ADJUSTING TORQUE LEVEL USED TO STOP THE INNER LIMIT

The number of times the UP button (N) is pressed will determine the level of torque applied before the motor will stop at the inner limit. Press once for 25%, twice for 50%, three times for 75% or four times for 100% torque required to stop. (Default is 25%)
HANDY TIPS
- Always roll the Awning out and in first if setting the inner limit manually. Failure to do so may result in a change of limit position due to a change in fabric tension.
- When pressing up and down simultaneously during setup, be as precise as possible. Ideally it should sound like one button click when both are pressed.
- If you catch yourself making an error during a setup process, stop and allow 10 seconds for the motor to time out, then try again.
- Do not hold any buttons down during setup process unless specifically told to do so. A half second press should be plenty and allow 1 second between presses.
- If you are using a multi-channel remote, make certain that it is on the correct channel before you assign it to a motor.
Turning on/off the outer limit rebound
The outer limit rebound is a function that tightens the fabric once the awning has reached it’s outer limit and it turned OFF as the default setting. It does this by doing a small reverse rotation after the outer limit is reached. In some situations this may not be desirable.
To turn the rebound function ON:
(Press Up and Down simultaneously) + (press STOP 3 times) + (press UP once)
To turn the rebound function OFF:
(Press Up and Down simultaneously) + (press STOP 3 times) + (press DOWN once)
Note: If the inner limit is set manually, the rebound function will not work.
Manually setting the inner limit
This folding arm awning motor is designed to set it’s own inner limit based on torque sensing. If you need to set an inner limit manually, it can be done using the following procedure only.
Delete outer limit first (inner limit cannot be set manually if outer limit is already set)
(Press Up and Down simultaneously) + (press STOP 4 times) + (press DOWN once)
Adjust awning to desired inner limit position and set inner limit
(Press Up and Down simultaneously) + (press STOP twice) + (press UP once)
Now adjust awning to desired outer limit position and set the limit
(Press Up and Down simultaneously) + (press STOP twice) + (press DOWN once)
Your limits are now set.
Be aware that if inner limit is set manually, the motor will not rebound (self tension) at the outer limit. Deleting the outer limit will also delete the inner limit automatically. Deleting the outer limit is the only way to delete the inner limit. A manual inner limit may change position as fabric stretches over time.

